Showing posts with label rococo. Show all posts

Sunday, November 24, 2019

Finished

This house will probably never be "finished" but the installation of the mouldings which the last post was about is now finished, anyway. There were 27 section of moulding, each about 2.4 metres long, it went into the passageway, a stair vestibule and another small vestibule which connects to the end of the main passageway.

Below are a few pictures of the results.

Stair vestibule

A joined corner

Small vestibule
The pattern had to be cut down and joined in the middle in order for the
corners to meet up properly

Another view of the small vestibule

One end

The other end.
The possibility of the corners in both ends lining up was very low and
creative sculpture work had to compensate for the fact that the pattern
did not line up nicely

However, the overall view of it looks fine.

A reminder of what it looked like before this round
And how it looks now (from the opposite end)


Sunday, October 13, 2019

Three Months of Painting

Somehow what I do keeps evolving. For a long time, I called myself a "cabinet Maker" but with an average of two commissioned pieces of furniture per year that did not seem like a very realistic title. At the same time, I have always found myself doing many other creative and artistic projects to earn my livelihood. For the past five years, I have simply been referring to myself as an "artist", which is what I have been all of my life anyway.

My latest project has again been in the field of artistic creativity and I have spent the last three months. (we are talking about 60+ hours per week) painting some large plaster cornice moulding. A part-time assistant also helped to sealed up the top and bottom border where the gilding was done.

Three pieces of finished moulding

The moulding comes from my friends at Decorator's Supply in Chicago Illinois. They have been producing plaster and compo mouldings and ornaments for more than a century and have some very nice products on offer. This particular plaster moulding was absolutely perfect to begin my project with. I usually do not like buying ready-made products because it means that someone else, somewhere in the world will also have the same product, but with this project, I knew the level of decoration that I was planning would truly make it 100 per cent unique and individual.

The mouldings come completely white, and crated up, six pieces to a crate. (Very heavy to move around) What follows is a picture sequence of most of the steps in decorating them.


The first step is to seal the top and bottom borders which will be gilded. After
that, the quatrefoils (four "petals" inside a "circle) all have to be filled in,
beginning with the middle. Since the piece is a "cove" moulding, it is easier to
shift the position to paint the upper and lower areas later

The piece has been shifted so that the lower quatrefoils can be painted
Some pieces had imperfections and bubbles which had to be fixed in the
process of doing the work


Once the middle and lower areas are complete the piece is turned upside-down
and the upper quatrefoils are then filled in. All of the paint is casein paint; it
works beautifully with the plaster. Once the "pink" is finished I move on to
a pale yellow and paint all the areas wanting that colour

Painting the "pink" is the most time consuming, taking more than one day for
each piece. The next most time is taken up with the mustard yellow...

...Half is done and then the moulding is turned back "right-side-up" to finish
The little knife I made a few years ago by hammering a nail until it had a
spring temper to it. It's shape is mostly what came of the hammering process
but it turned out to be a wonderful little tool and great for fixing minor slips
with the paint.

The green leaves follow. Most of the colours are applied in a wash so that
the plaster still shines through as can be observed in porcelain painting

A lighter "russet" wash and then a dark opaque add some colour to the flowers
which will remain white

The last step in the painting comes with manipulating a single colour of blue
to create an entire spectrum of colour for the remaining flowers
(in this picture, the paint is still wet)

For gilding, I used a "slow set" oil size. This meant that in the evening, before
going home, I would need to apply it, and on the following day (12 hours
later) apply the leaf.

I lay all the leaf on and then press it down on simple reliefs such as this

The top is more complicated so it must be applied and pressed down as I go
The drops of size on the paper speak for themselves as to why it is there, but
all of these drops occurred in the course of doing 27 sections of moulding

The final product - almost. The flowers do not have as much definition once
the paint is dry...

...so a bit of clear shellac in places gives them back the look that they had
when wet

Quite surprising for myself, was the fact that in the course of three months of painting all of this I really never got burnt out and fed up with doing it. I was afraid that it would become drudgery, but up to the last one I was still actually enjoying painting these. Now I have to get the space ready for the installation... 

Stay tuned.


A larger section of one piece, showing the entire pattern
(This picture was taken before the last phase of enhancing the blue)


Monday, April 15, 2019

Finished At Last

It has been quite some time since I posted anything on this blog and I apologies to everyone who has been patiently waiting for any news. The truth is that the project that I have been working on since November, and actually for more than two yeas, took far longer to complete than I had anticipated.

Originally I was to have been done by the end of December, but it quickly became obvious that that would never happen. I then projected an end of January completion but as thee gilding went on and on that got pushed into February. To push completion off even further the client wanted me to finish two more small rooms connected to the main room, so here we are at the middle of April and finally it is done (almost).


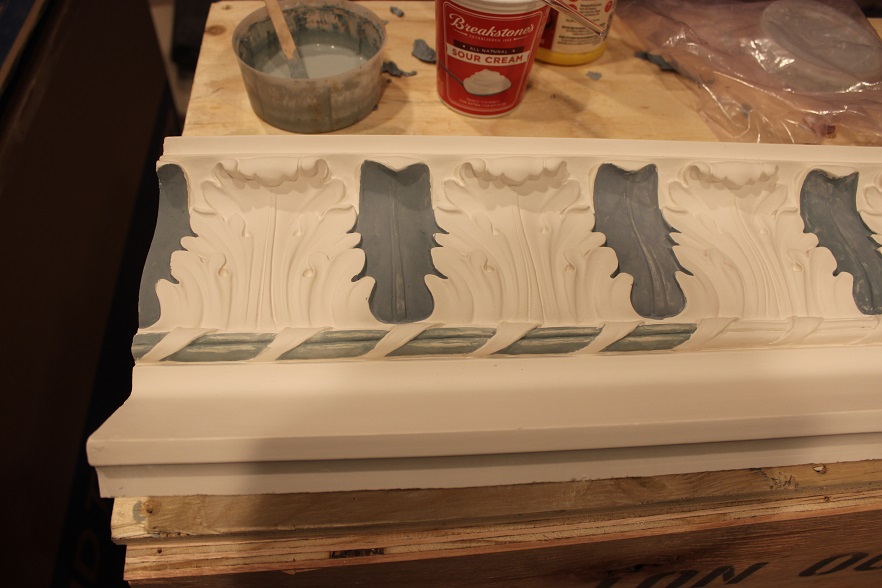
This is the same wall featured in the last blog when the cornice was underway

I said almost because there are still a few things that will eventually get done. For one thing, the panels on the cabinets are too plain and I am planning some parquetry for them, surrounded by a thin gilt border. There is also talk of doing some faux marble on the lower wall panels, but that has not been finalised. In addition, the two panels over the doors need some painting, so in fact, there is still quite some work to do in this room. The good news, for the client, however, it that he can finally begin using his office, something that he has been eagerly looking forward to for nearly two years, since the planing of this first took place.

I was so busy with this project in January and February that, were breathing an option, I would have forgone that. By the end of March, however, I was really needing a break and took one in the form of visiting Washington DC to see the cherry flowers one cloudy, chilly, spectacular Sunday morning.


I always love spring and all of the flowers that
come with it

A couple weeks ago I also was asked to participate in Catholic University's "Medieval Day" where I had a table set up with some of my carving, boxes, and a couple reproduction medieval tools created by myself. Unfortunately most of the pictures that I took did not make it onto the memory card, (I have no idea what that was about) but I did capture this very poignant image.


Time Travel?


Back to the room, here are a couple more shots. In honestly, when I look at the whole thing it almost makes me wonder why it took so long to get finished. The end was so long in coming that the completion was very anti-climatic. At least the clients are pleased with it.


The doors are made to look like the double doors found in many French
chateaus, but in fact, because they are scaled down, they are each only a
single door which opens from one side. Eventually these over-door
panels will be decorated with monochromatic painting


I don't like taking pictures with the flash on the camera because it tends to "wash out" a lot of areas but this one is not too bad and it gives a much closer to true colour impression.


Fairly accurate colour rendering 

Oh, yes, one more thing that still wants finishing; the leather on the top of the desk has not yet been attached. There is still a lot of decorating and furnishing to do to make this a completed office, but these five pieces are my work and thus their inclusion in these pictures.


Sunday, January 27, 2019

...and so begins another year

I have not had much time to post anything on this blog lately and probably all of my readers are wondering what I have been up to.

The answer is that I have been very busy trying to get this room finished up for the client by the end of the month. I still have a ways to go, but am making progress.

Here are a few pictures for those who have been clamouring to see.


I forgot to take a picture before I started, but this is one just after things
got going. The big plywood boxes are full of the plaster cornice segments


The short answer is carving, painting, gilding, and finishing.

Once this room is finished I will put up some more pictures...stay tuned.

Monday, July 9, 2018

A Short History of the Acanthus Leaf

As regular readers will have noted by now, I work a lot in both 18th century rococo style and in medieval styles, (where my true passion lies); some people might find this odd and think there is no connection between the two styles. Having spent a lot of time working with both of them, however, I realise that they actually do have a lot in common.

Over the centuries scores of literary works related to the design, origin, and style of the acanthus have been written and it is not my intention to add anything to what has already been done because I am quite sure I have nothing more to add. I simply want to show the natural evolution and continuity of the form over the course of history.


Detail of a 3rd century BC acanthus and flower base to a Greek column now
on display in the Louvre


Supposedly, the acanthus as an inspiration for ornament, had its origins in 5th century BC Greece. According to legend, as expounded by Vitruvius (1st century BC Roman author and historian) Callimachus (5th century BC Greek architect and sculptor) saw a basket which had an Acanthus Mollis plant growing around it and a tile on top, and this inspired the now famous form of the Corinthian Capital; which, of course, has acanthus leaves as its main ornamental motif. It would seem, however, that the plant soon gave inspiration to the ornamentation of more than just capitals, as can be seen by the column base from the 3rd century BC, pictured above.


Louis XIV ornament from Versailles; this ornament has a direct connection
with the ornament more than two thousand years prior, as pictured above
and was the the last in the evolutionary link leading up to the Rococo stlye


Most art histories will tell you that the forms of Greco-Roman art were "rediscovered" in the 14th century, which gave rise to the Italian, and then European wide Renaissance. (Which evolved into Baroque and the Rocco art, respectively) There are many problems with this notion, however, because the Greek and Roman ruins were scattered all over Europe, only gradually disappearing due to re-use and other ravages of time, never wholly being obliterated. Medieval artists had plenty of Classical inspiration to choose from, when and if they chose. The 1st century Roman "engaged" column, pictured below, is a good example; it was re-used as a door jamb during the Middle Ages. One can find nearly inexhaustible references to this basic motive throughout the medieval period, interpreted by each generation according to their own sense of "modern" taste and inventiveness.


Roman relief of the 1st century AD, now in the MET
12th century
scrolling ornament
Louvre

The above picture, which is from the side of an altar, now in the Louvre, is a direct artistic evolutionary continuation of the Roman example pictured above. Over time, the leaves changed and birds and figures replaced the original flower at the centre of the design, but this is an evolution of the same idea, as seen through the eyes of 11th and 12th century artists. Other variations on the same theme can be seen in the following two illustrations as well.


12th century acanthus capitals from Saint-Guillhem-le-Desert
now in the Cloisters, New York

Detail of a 6th century marble column from
Toulouse, now in the Louvre


Supposedly the Romans added the curled heads to the Greek acanthus leaf, giving us the style that we are most familiar with today. I am not sure how true that statement is, because there is some curling to the design pictured at the beginning of this article. There is also a 4th or 3rd century BC Greek funerary urn that I photographed, which has a somewhat curly form to it as well. (pictured below)


4th or 3rd century BC base of a Greek funerary urn. North Carolina Museum
of Art


The leaf of this urn is very much in keeping with the style of those on the 6th century column, the 9th century ivory plaque, pictured below, and the 12th century capitals, shown above and below. This form of the acanthus had a long and variegated history, but it is almost always recognisable as having the same pedigree. 


Detail of  Carolingian ivory, now in the Cloisters

End of a 12th century compound capital now in the Cloisters


There was another form of the acanthus, however, (with pointed "spiky" leaves) which also had prominent use, but more commonly in the Greek and Byzantine sphere of Europe, than in the western lands. Many examples, both Medieval and Classical, exist, and this form also continued through the Middle Ages and into the Renaissance, as demonstrated by the column segment shown below.


An engaged capital of 9th century Byzantine form, now in the Louvre


An early 16th century renaissance column
now in Philadelphia Museum of Art


It was the curly headed version that was the most common throughout most of Europe, and the form which carried on into the 18th century rococo period.

Crest of a 15th century altarpiece, now in the Cloisters

Detail of a renaissance tapestry, now in the MET

Detail of an acanthus corner on a highly decorated casket, now in Philadelphia


The supposed "unbridled" exuberance of the 18th century French taste had many previous incarnations, as demonstrated by the Roman painting from Pompeii, (2nd illustration, below) the curled and playful leaves of the Romanesque period, and the late Gothic, "flamboyant" style of the 15th and 16th centuries. (3rd and last picture, below)


Part of a Stained glass border; French ca. 1200 Now in Philadelphia


Detail of a wall painting from Pompeii, now in the MET

15th century frieze, carved in wood, now in Philadelphia

18th century acanthus ornament from Chateau Champs-sur-Marne

Late 15th or early 16th century tapestry, now in the Cloisters


In art nothing is ever really new, and everything draws inspiration from what came before. In decoration, there has always been a sense of coming and going of fashion, and ornamentation has a very cyclical nature. Things turn up again and again, and motifs fall in and out of popular favour to a greater or lesser degree, but nothing ever really disappears. The Gothic style "fell out of taste" in the 16th century, but can still be found in some places into the 17th; by the middle of the 18th century it had its first "revival", and has been in and out of fashion ever since. Likewise, the rococo style fell out of favour around the time of the French revolution, but by the 1840's was being produced again in fashionable circles, and in fact, in provincial France, the style never ceased to be appreciated.


(all photos for this article are my own, taken on various museum visits in the past couple of years)


Videre Scire