Sunday, January 24, 2016

Making Plaster Moulding

The project which I have been working on for the past 4 months has given me a chance to practice a lot of different skills that I have developed over the years, not all of which are actually related to furniture or woodworking. However, I am not just a furniture maker, I am an artist. One thing that I like about being an artist, is the chance to discover and try new techniques and methods of doing things.

Such has recently been the case, because I have been teaching myself how to make plaster moulding. I am sure that I read, many years ago, that this type of moulding is called "struck moulding", but I have been unable to verify that at present. Simply put, the process  consists of making a template out of a thin material (metal) and passing it over the wet plaster. There are a lot of subtleties to the process, however, and I am sure I have barely scratched the surface of discovering them. I have managed to figure out enough, though, in order to get the job done. Below are some photos of the process, and some of the resulting product.

To make a curved piece of moulding is much more challenging than making
a straight section; unfortunately, I needed arches, so I had to jump in at the
deep end. If  I were to start over with this, I would have made and arm which
pivoted from a centre point, but I did not think of it until after I was finished.


My regular readers will already be aware that another of the skills that I posses,
is that of metalworking. This skill comes in handy when one needs to make
templates. I first used a pair of snips to cut as much material away as possible.

I then used a file to finish up the shape according to the profile I desired.
There was no "right or wrong" for this profile because I invented it...

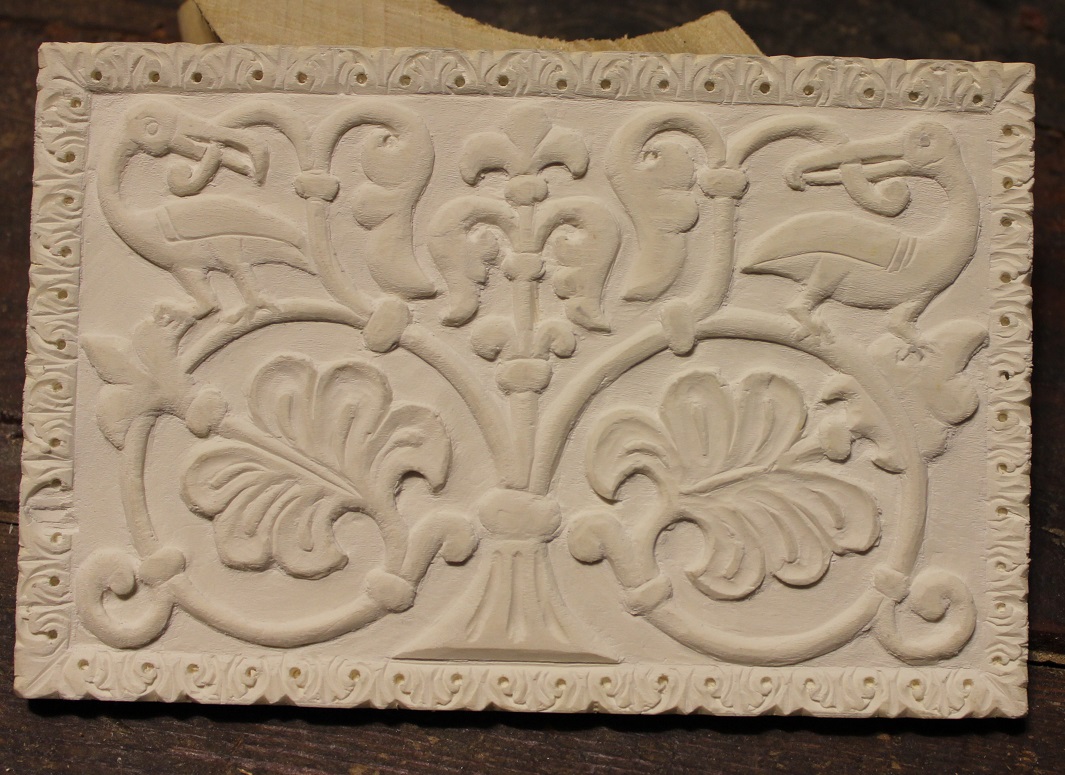
But this one had to follow an existing section of moulding; looks like it does.


Making the moulding cannot be done in one pass, it must be built up and allowed
to set before another layer can be laid down, otherwise there is too much material
squishing around. I put a section of rope into the wet plaster for strength.

After the second pass the moulding begins to take shape, but it is still not perfect.

The third coat is a thin layer spread out all over the moulding.

One final quick pass with the template makes a finished piece of moulding.
This is one half of the large flat arch going into the vestibule.
After three or four days it will be dry enough to crack free from the varnish which
I applied to the area of the table, covered by the plaster.


Sunday, January 10, 2016

9th Century Ivory Box - Right End Panel

Happy New Year to everyone. I had intended to post last week, but my "real job" has been keeping me too busy. I also had to write an article for a tool collecting newspaper; thus, this is my first posting for 2016. How did we get here already. I remember as a kid in 1974 thinking 2000 was so far away I would never live to see it, yet here it is, 2016 already!


This 9th century box I have been working on is something very important to me, I see it as a mission to demonstrate that there can be more to re-creating medieval furniture than dug-out coffers and "six plank Viking chests" Even though I have been extremely busy with my paying project, ( I have been averaging 74 hours per week on it) I still want to keep the momentum going on this little chest. Taking a cue from the tortoise, even if the progress is slow, keeping at it will eventually result in the project getting finished.

Over the past few months however, the progress has, by comparison, made the humble turtle seem to be positively streaking along. In October, when I went to take the class with Peter Follansbee, I took this panel with me, thinking that I could work on it in the evenings, and early mornings, but only managed to get the head of one bird carved before the last day of the class began. I again took it with me to my show in York, but most of my time was spent carving pieces for my job, and only on the last day, did I have about 4 hours in which I managed to get the rest of said, left-hand bird finished.

For Christmas, I determined to give myself a gift; namely the time to work on the carving again. Over that weekend I was able to get the rest of the vines and flowers carved, along with the second bird, but I still had to finish the border. I was able to get that finished, bleached out, trimmed to size, and inset, this weekend.


The bright sun really enhances the whiteness of my faux ivory.


This project has gone through a lot of evolution from my initial concept. It was originally to have been a box made all from holly, and, had I done that, it would be more than half completed by now. The first shift came, however, from my studying of several boxes which were constructed of some sort of wood with ivory panels inset, so I began making this box after that manner of construction. (For anyone reading this for the first time, I will repeat that my goal is to re-create an ivory box, but since ivory is a banned material, I have landed upon the idea of using bleached holly, which makes a fairly convincing substitute.)

Another factor in changing the construction details of the box, was the fact that the sides are a bit wider than a piece of ivory could realistically give. I have since come across a 10th century box which is about the same size, and the problem was solved by simply joining narrow strips to the panels to make them wider. At the time I began this project, however, I did not know if such methods would have been used, so I did not try to do that. I am going for a very convincing, and authentically constructed box, so if I have nothing to back up my methods, I will not use them.

Overall view of the box, viewed from the right


For some reason, I hate pictures of boxes or chests viewed from the right end, so to set the world right in my mind, I will put another view of the other end, which is the way I like to view rectangular objects.


Today was bright and the weather pleasant, so I thought it would make a
nice picture, unfortunately, it was too bright for the camera, so the details
are largely washed out. I guess I am better as a carver, than a photographer.

Up next is the back panel for this box. I have no idea when I will get finished with it, but will try to get working on it soon. This, and the top panels will continue the narrative of the story of Bellerophon and Pegasus, the subject of the front panels.


The back panel smoothed and ready to have the design drawn in.
It will be made from the centre material left from the ends
and front panel pieces. Just as with Ivory, the material is expensive
and not readily available, so care must be used to avoid waste.
I am able to get three layers of panel out of a single 25mm plank.